佐久間です。
「Reporting ServicesとBing MapsでWEB上のHTMLデータを可視化するレポートを作成する」
ついに連載の最終回を迎えました。(目次はこちら)
前回に引き続きReporting Servicesのレポートをアプリに組み込みます。
参考-2. ASP.NETからSSRSのレポートを利用する← 今回
参考-2. ASP.NetからSSRSのレポートを利用する
ASP.NETのサイトにReportViewerを組み込むためにはまずWeb.configを編集します。
下記の項目を追加してください。
<system.web>

  <compilation debug="true" targetFramework="4.0">

    <assemblies>

      <add assembly="Microsoft.ReportViewer.WebForms,
Version=10.0.0.0, Culture=neutral, PublicKeyToken=B03F5F7F11D50A3A"/>

      <add assembly="Microsoft.ReportViewer.Common, Version=10.0.0.0, Culture=neutral, PublicKeyToken=B03F5F7F11D50A3A"/>

    </assemblies>

  </compilation>

  <pages>

    <controls>

      <add tagPrefix="rsweb" namespace="Microsoft.Reporting.WebForms"
 assembly="Microsoft.ReportViewer.WebForms, Version=10.0.0.0,
Culture=neutral, PublicKeyToken=b03f5f7f11d50a3a" />

    </controls>

  </pages>

  <httpHandlers>

    <add verb="*" path="Reserved.ReportViewerWebControl.axd" type =
"Microsoft.Reporting.WebForms.HttpHandler,
Microsoft.ReportViewer.WebForms, Version=10.0.0.0, Culture=neutral,
PublicKeyToken=b03f5f7f11d50a3a" />

  </httpHandlers>

 </system.web>
次にレポートを表示させるページにReportViewerを配置します。
ReportViewerにはReportServerのURLと表示させたいReportのパスを設定してください。
Visual Studio 2010のReportViewerコントロールはAJAX対応のコントロールに変更されたので、
ScriptManagerも一緒に配置する必要があります。
<asp:ScriptManager ID="ScriptManager1" runat="server" />

 <rsweb:ReportViewer ID="ReportViewer1" runat="server" ProcessingMode="Remote">

  <ServerReport ReportServerUrl="http://winsvr2k8r2web/ReportServer_ENTERPRISE"

      ReportPath="/EarthquakeReportServer/Map" />

 </rsweb:ReportViewer>
ここまできたらデバッグ実行してみましょう。
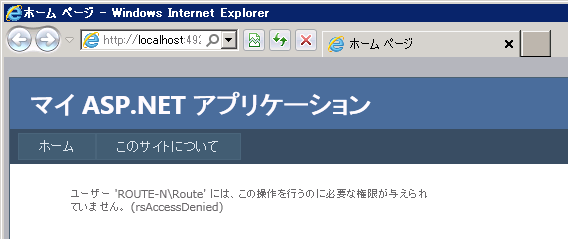
rsAccessDeniedが表示されればReportViewerの配置は完了です。
Windows Formsよりはちょっと手間がかかるものの、
それでも上記の作業だけでReporting Servicesとの通信はできています。
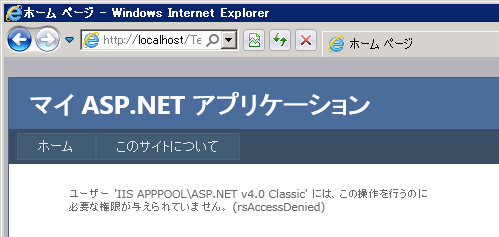
ちなみにVisual StudioをReporting Servicesにアクセスできるユーザーで実行していると
この時点でレポートを表示できてしまいますが、IISにデプロイすると当然表示できなくなります。
次は権限の設定を行います。
1. 偽装
アプリ側にとって最も簡単な設定方法は偽装の有効化です。
サイトのWindows認証を有効にした上でWeb.configに下記を記述してください。
<system.web>

  <identity impersonate="true"/>

 </system.web>
これだけでWindows Formsと同様にActiveDirectoryのユーザーに対する管理が行えます。
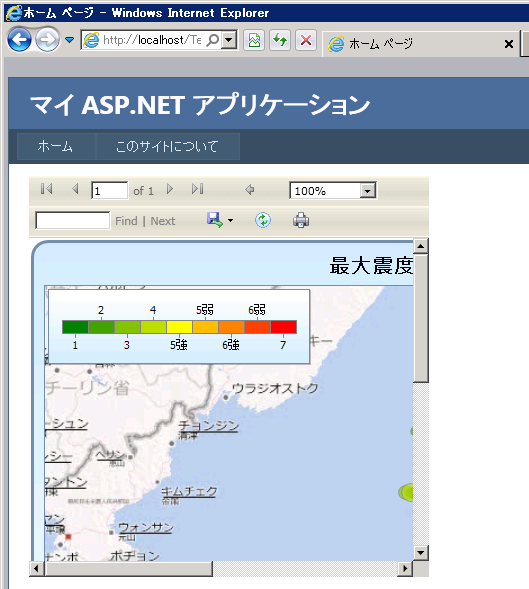
・権限借用が無効な場合(既定)
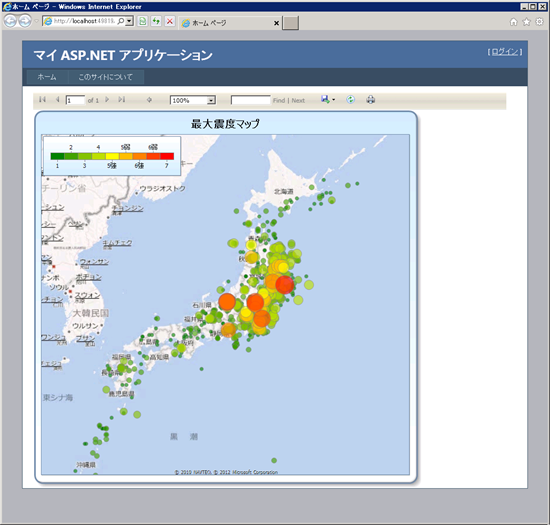
・権限借用が有効な場合
2. IReportServerCredentialsを実装する
IReportServerCredentialsを実装してReportViewerに渡すと、
アプリの処理でレポートにアクセスするユーザーを動的に変更することができます。
まずはIReportServerCredentialsの実装です。
レポートを表示するだけならNetworkCredentialsメソッドの実装のみでOK。
public sealed class ReportServerCredential : IReportServerCredentials

 {

  public WindowsIdentity ImpersonationUser

  {

    get

    {

      return null;

    }

  }


  public ICredentials NetworkCredentials

  {

    get

    {

      string userName = "ReportにアクセスできるUser";

      string password = "パスワード";

      string domain = "ドメイン";

      return new NetworkCredential(userName, password, domain);

    }

  }


  public bool GetFormsCredentials(out Cookie authCookie, out string userName, out string password, out string authority)

  {

    // 出力パラメータのみ初期化

    authCookie = null;

    userName = null;

    password = null;

    authority = null;


    return false;

   }

 }
次にReportViewerのReportServerCredentialsプロパティにインスタンスを渡します。
ReportViewer1.ServerReport.ReportServerCredentials = new ReportServerCredential();
これだけ。
NetworkCredentialsメソッドを明示的に呼び出す必要はありません。
偽装と比べるとコード量は増えますが大したことはしないので簡単ですね。
ただし、この方法には下記の2 つの欠点があります。
・ASP.NET セッションを有効にする必要がある
・ページを表示するユーザー毎にオブジェクトのインスタンスがセッションに配置されるため、
セッションが不必要に大きくなる可能性がある
これらの欠点を避けるためにはIReportServerConnectionまたはIReportServerConnection2を
実装する必要があります。
3. IReportServerConnectionまたはIReportServerConnection2を実装する
実装そのものはIReportServerCredentialsとさほど変わらないのでここでは割愛します。
MSDNにコードサンプル付きで情報がまとまっているので下記を参照してください。
接続および資格情報を ReportViewer Web サーバー コントロールを指定します。
権限の設定が終わったら最後にレイアウトを調整して完成。
以上です。
当連載はSQL Server 2008 R2とそれに付属するIntegration Services・Reporting Servicesを使って
Web上のデータを地図にマッピングして可視化する方法を扱いました。
ここでの実装方法はSQL Azure Reporting改めWindows Azure SQL Reportingにも応用できますし、
Integration Servicesのタスクをバッチに置き換えればAzure Platform上で完結させることも可能です。
アイデア次第でいくらでも化ける仕組みなので是非とも活用してみてください。
連載は今回で終了致しますが、日本語の情報が少ない製品群なためか検索エンジン経由で来てくださる方が
とても多いので、今後も時折これらの製品の情報を織り交ぜていきます。
[参考]
・Getting Started Guide for Application Developers (Windows Azure SQL Reporting)
・WebForms ReportViewer コントロールの使用